How to Draw a Castle: A Step by Step Pencil Guide
Learn how to draw a castle in pencil with a clear nine-stage method that builds the towers, curtain wall, and weathered stone without overwhelm.
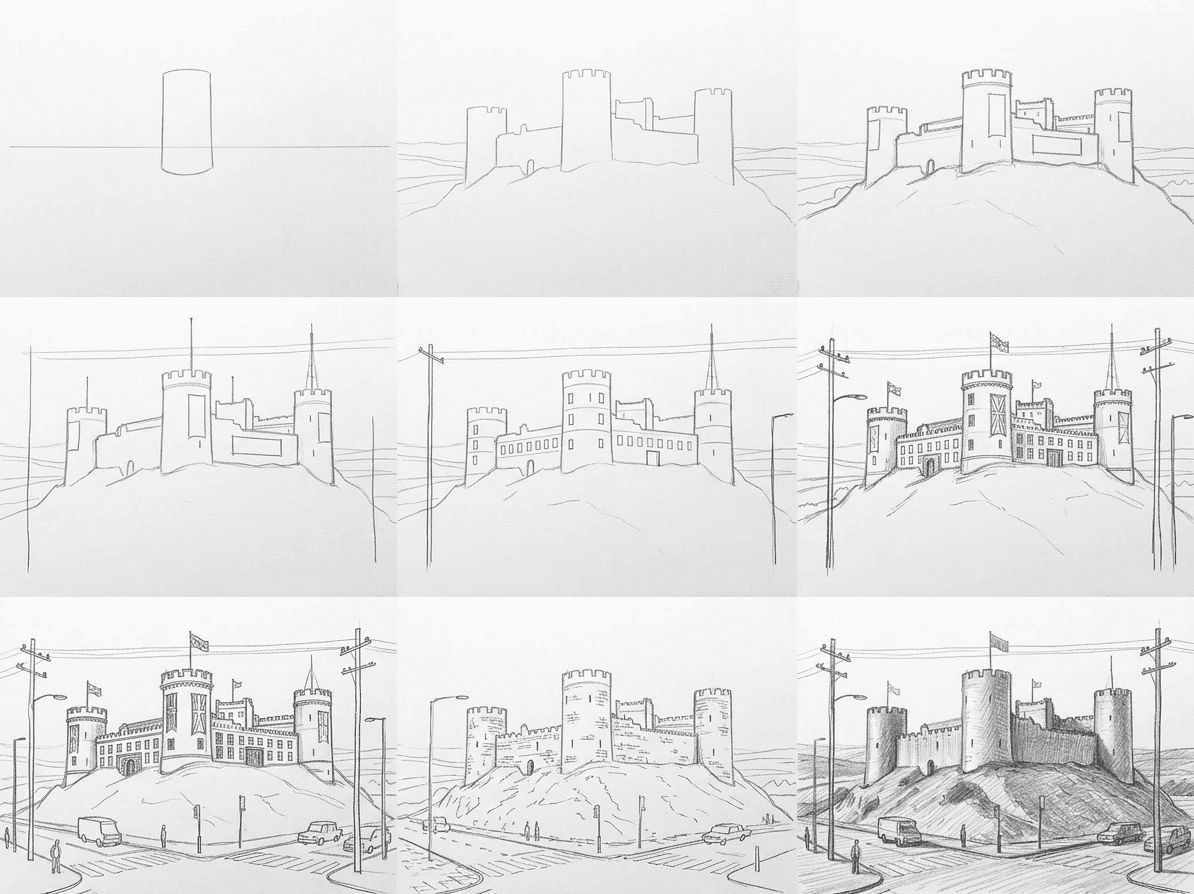
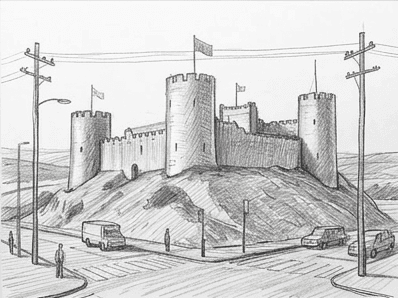
Learning how to draw a castle looks intimidating until you see it as a stack of simple shapes. A medieval fortress is really a few cylinders, a couple of boxes, and one long wall, all arranged on a hill. In this castle pencil drawing walkthrough you build the scene across nine small stages, starting with a single tower and finishing with weathered stone and deep shadow. Work at a calm pace and each stage hands you a clear checkpoint to pass before the next one begins, so you never feel lost. You do not need any prior experience with buildings or perspective, only the willingness to draw light first and dark last.
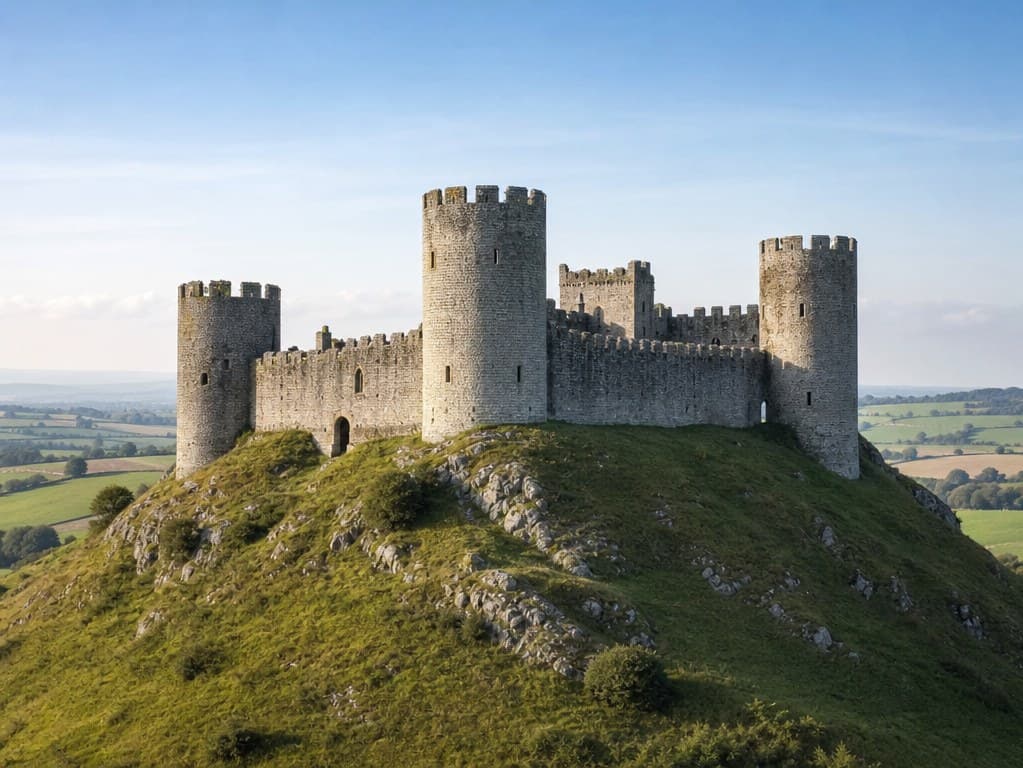
What you will need
You need three pencils and not much else. An HB handles the layout lines and the light guides that you will erase later. A 2B builds the mid tones on the walls and the shaded side of each tower. Keep a 4B or 6B ready for the darkest notes, the arrow slits, the gateway arch, and the band of shadow under the wall where it meets the hill.
Use smooth or lightly textured drawing paper around 120 to 160 gsm so you can lift the early guides without tearing the surface. A kneaded eraser pulls graphite up gently, which matters when you clear construction lines off finished stone. A harder vinyl eraser gives you crisp edges, like the bright sky gaps between two battlement teeth.
A ruler is optional. Most of this medieval castle sketch reads better with a slightly loose hand, because perfectly straight walls look like a printed diagram rather than weathered rock. Save the ruler for the horizon line and the base of the wall, then trust your eye for everything that sits above it.
Why we break this into nine stages
The nine-stage method is the construction-line approach that architects and concept artists lean on. Instead of drawing the finished castle straight away, you place the big shapes first, check their proportions, then commit to detail only once the bones are right. This keeps beginners safe. If a tower sits too far left, you notice it at stage two when it costs one eraser stroke, not at stage eight when fixing it would mean redrawing half the page. Each step in this draw a fortress step by step sequence adds one layer of decisions and nothing more. Catching a problem one stage early is the whole point, and it is the habit that separates a relaxed sketch from a frustrating one.
Stages one to three: block in the towers and wall
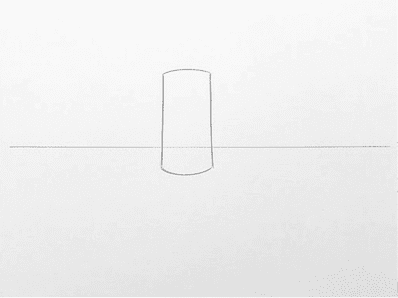
Start with the horizon line across the lower third of the page, then draw the central keep as one tall box that narrows slightly toward the top. That gentle taper is what makes a tower feel heavy and grounded instead of like a soda can. Keep the lines faint. This first shape sets the height that every other part of the castle will be measured against.
Now add the two flanking towers and rough in the hill. Place the side towers a little lower and slightly narrower so the central keep stays the tallest point in the group. Sketch the rounded landform under all three with one loose contour. Compare the gaps between the towers by eye, because even spacing is what sells the balance of a fortress.
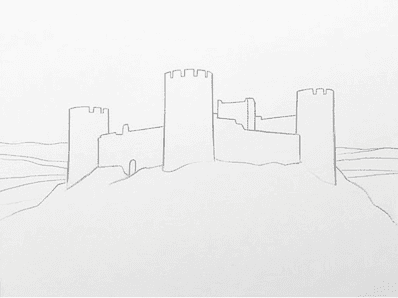
Connect the towers with the curtain wall and drop in the inner buildings. The wall is just two long horizontal lines running tower to tower, dipping a touch as the ground falls away. Add the smaller boxes behind the wall that hint at the great hall and gatehouse. Hold everything as light outlines for now and resist the urge to shade.
Stages four to six: guidelines, then a clean outline
Add the tall vertical accents next, the flag poles on the towers and the thin spire on the right. These uprights give your eye something to measure against and stop the towers from leaning. Extend a few faint guide lines out to the sides as well, so you can keep the wall heights consistent as they travel across the page.
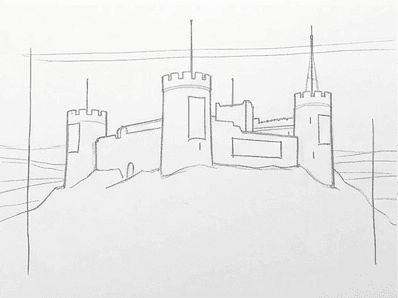
Draw the construction guidelines that will govern the small repeating parts. Mark a light band along the top of each wall and tower where the battlements will sit, and a second band for the row of windows. Even spacing here is everything. A line of crenellations that drifts up or down is the fastest way to make solid stonework look wobbly and rushed.
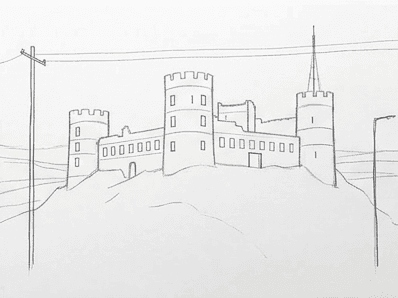
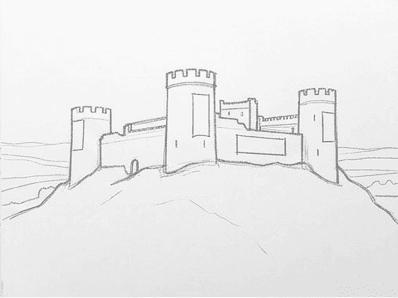
Erase the guides you no longer need and tighten the outline. Press the kneaded eraser over the rough search marks to fade them, then redraw the final silhouette with a firmer, more confident line. This is the moment the drawing stops looking like scaffolding and starts looking like a building you could walk up to.
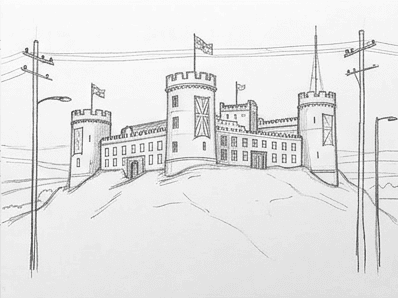
Stages seven to nine: detail, tone, and texture
Add the windows, doors, and ornament. Cut the square notches of the battlements along the bands you drew, then place the narrow arrow slits, the arched gateway, and a few small windows. Vary them slightly as you go. Hand-built stone is never perfectly regular, and those tiny differences are what read to the viewer as real age and weight.
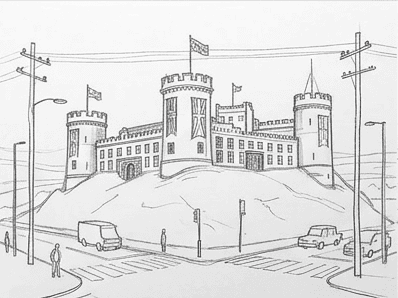
Ground the castle and lay your first layer of tone. Shade the hill below the walls and suggest the rocky foreground so the fortress sits on the land instead of hovering above it. Then sweep a light 2B tone across the shadowed side of every tower and the inner face of the wall, keeping one consistent light source so the forms stay believable. Leave the side that faces the morning light almost untouched, since the contrast between bare paper and soft graphite is what gives the stone its volume.
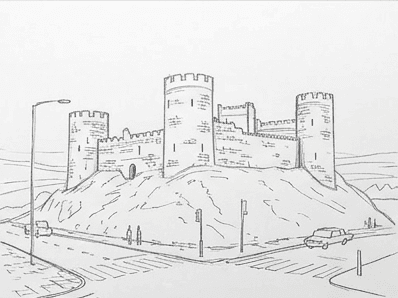
Finish by deepening the darks and building stone texture. Push the 4B into the deepest spots, under the wall, inside the gateway, and beneath each battlement tooth. Then suggest masonry with short broken horizontal strokes rather than drawing every block. Let that texture fade toward the lit side so the towers keep their round, cylindrical feel.
Common mistakes and how to fix them
A handful of errors show up again and again in a castle pencil drawing, and each one has a quick recovery. Spot them early and you keep the whole sketch on track rather than fighting it at the end.
- Towers like tin cans. If a tower looks flat, you skipped the taper and the shading. Narrow the top slightly and darken one vertical side to bring the cylinder back to life.
- Crenellations marching off level. This happens when you cut notches without the guide band. Erase the row, redraw one light horizontal line, and align every tooth to it before you ink the darks.
- A castle that floats. With no shadow or rock at the base, the building hovers in space. Anchor it with a cast shadow on the hill and a few loose stones tucked against the foot of the wall.
- Flat grey stone. Even pressure everywhere kills the form. Keep the lit side pale and save your darkest 4B strokes for the gateway and the line where wall meets ground.
- Overworked masonry. Drawing every single block looks mechanical and tired. Suggest a few courses of stone near the edges and let the rest of the surface stay quiet.
Practice prompts to try today
Run the same fortress again at dusk, with the light source dropped low so the towers throw long shadows that stretch across the hill. Next, draw a single tower up close, big enough to fill the page, so you can study how rows of stone wrap around a curved surface. Then redraw the whole castle from a lower angle, as if you stood at the foot of the hill looking up, which doubles as a useful architecture tutorial in gentle forced perspective. Each variation trains a different muscle while keeping the same nine-stage backbone.
Work through the nine stages once and the logic sticks with you: big shapes first, guides second, detail and tone last. That same order carries over to a cathedral, a barn, or a city skyline, so this one castle quietly teaches a method you will reuse for years. If you want this exact stage-by-stage breakdown built from your own reference photos, the How to Draw app on iOS and Android turns any picture into a guided nine-step sketch you can follow at your own pace.