How to Draw a Fox Step by Step in Pencil: A Beginner's Guide
Learn how to draw a fox step by step in pencil using a clear nine-stage method that builds the body, fur, tail, and shading without the guesswork.
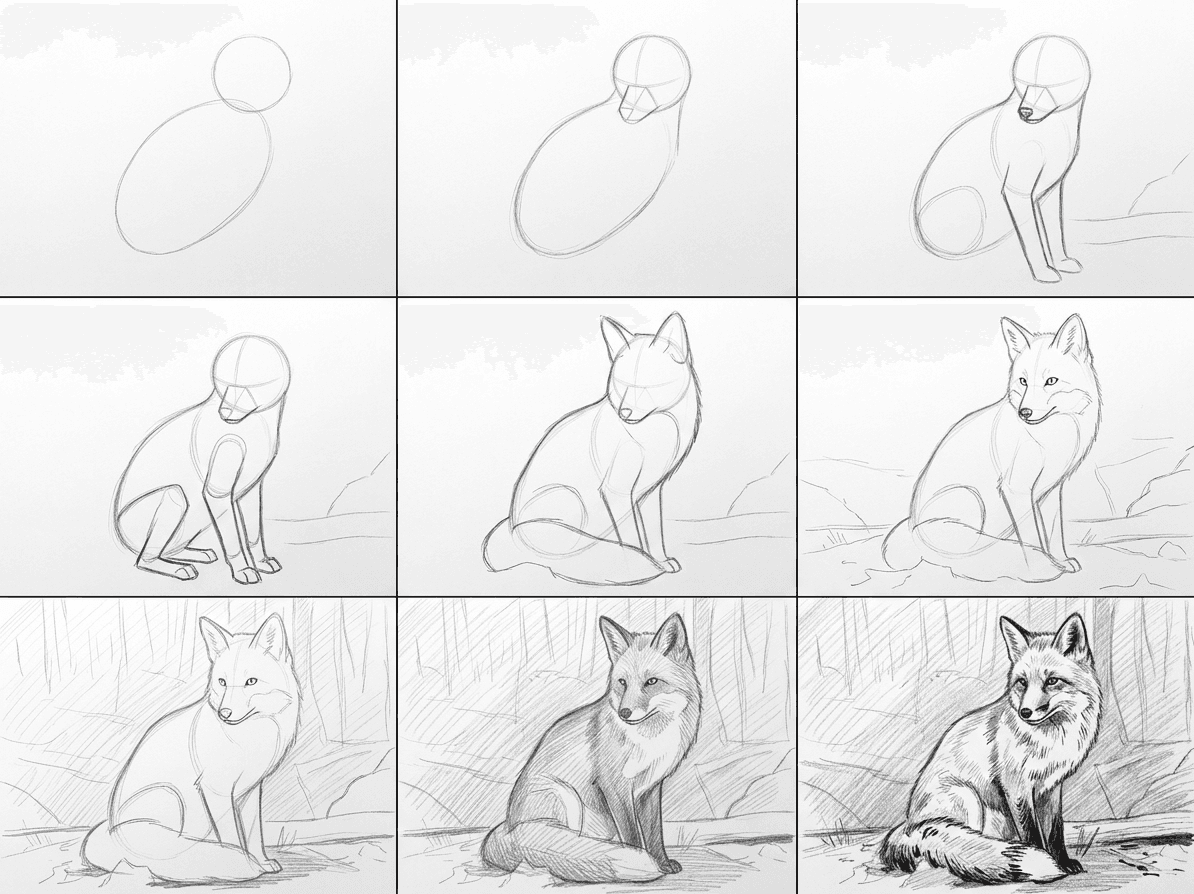
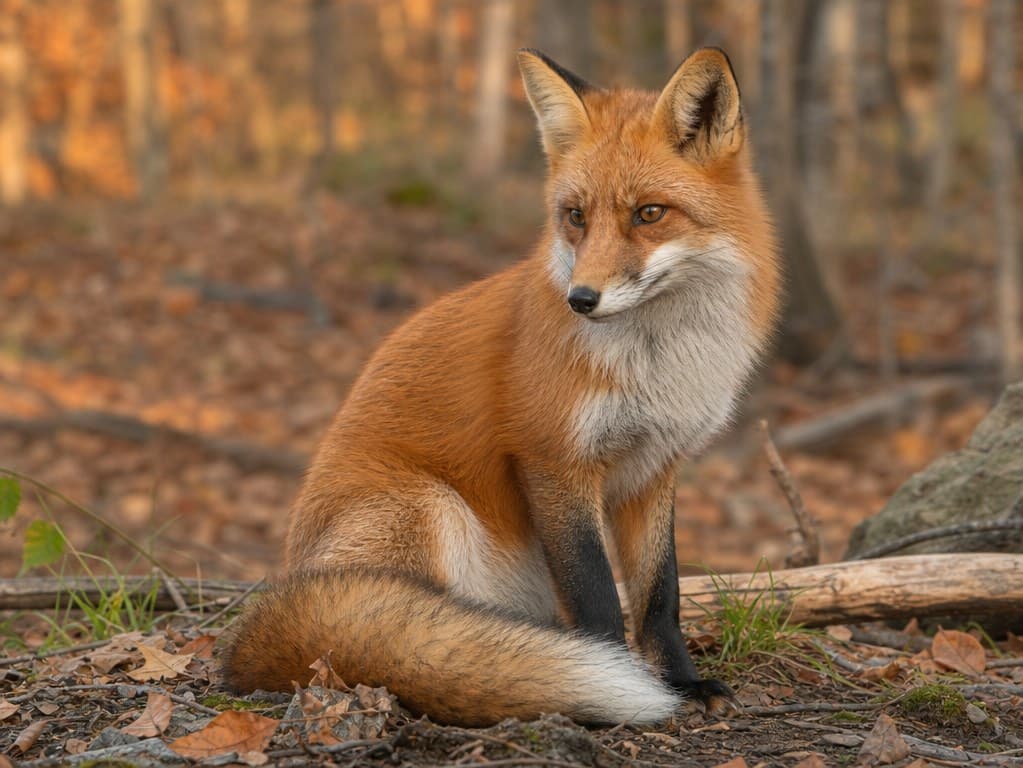
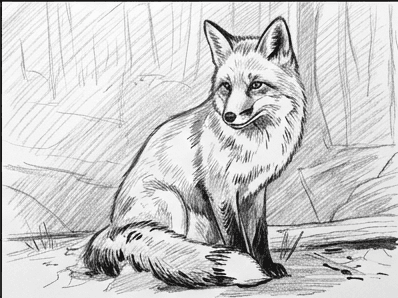
This guide shows you how to draw a fox step by step, turning one reference photo into a finished red fox pencil drawing across nine clear stages. You begin with two simple shapes for the body and head, then build the neck, legs, ears, and that famous bushy tail one move at a time. By the final stage you have shaded fur, a grounded pose, and the dark stockings that make a fox read instantly. You need no prior animal practice to follow along.
What you will need
You can draw this fox with very little kit. Two pencils and one eraser cover almost everything in this drawing. An HB pencil handles the light layout lines and the mid-tone fur. A 2B and a 4B give you the darker fur, the shadow side, and the black stockings on the legs. A kneaded eraser lifts graphite gently without tearing the paper, which matters once you start softening fur.
Use smooth or lightly toothed drawing paper around 120 to 160 gsm so the pencil layers cleanly without pilling. Keep a sharpener within reach, because crisp points matter for the whiskers and the fine fur along the back. A blending stump smooths the background nicely, though a clean fingertip works in a pinch.
Set the reference where you can glance at it without turning your head. Working from one clear photo beats copying from memory, and it trains your eye to measure real angles rather than the angles you expect to see. Good light on your own paper helps too, so angle a lamp from one side to read your values clearly.
Why this fox drawing tutorial uses nine stages
Each stage adds one idea on top of the last, so no single step asks too much of you. This is the construction line method. You block the big masses first and check the proportions while they are still easy to move. You commit to real detail only once the skeleton is right. If stage three looks off, you nudge a light oval instead of erasing finished fur. That safety net is why the approach suits a wildlife sketch beginner so well. You also build confidence, because every stage ends with something that already looks like a fox.
Drawing the fox stage by stage
Work lightly through the early stages and keep your whole arm moving rather than gripping the pencil at the tip. Each picture below shows one stage of the build, and the short note under it points to the checkpoint that keeps you on track. Resist jumping ahead to fur and eyes until the shapes underneath are honest.
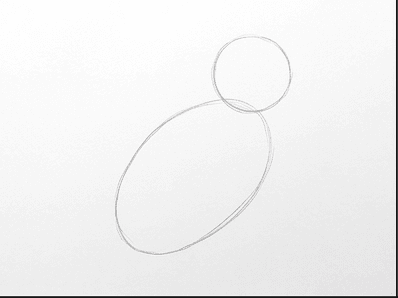
Start with a large oval for the chest and belly, then a smaller circle above and to the right for the head. Keep both shapes light. The overlap between them sets the whole sitting pose, so slide the head forward of the chest until the fox leans the way the reference does. Measure with your pencil held at arm's length if you are unsure, comparing head width against body width before you trust the shapes.
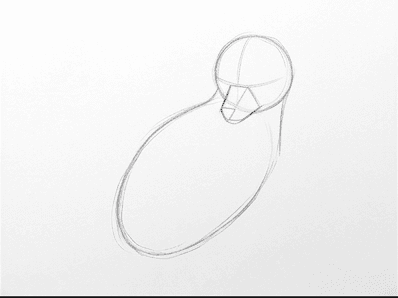
Connect the head to the body with two short curved lines for the neck. Then push a slim wedge forward from the lower face for the muzzle. A fox muzzle is narrow and pointed, so keep the wedge tight. Add a faint center line down the face to help you place the nose and eyes later.
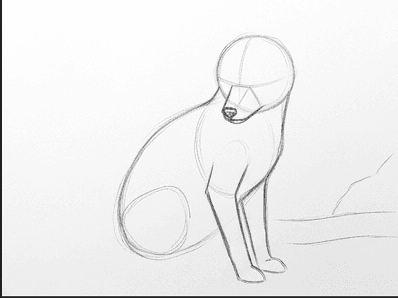
Drop the two front legs straight down from the chest to the ground, with the near leg set slightly forward of the far one. Foxes have slender legs, so resist making them chunky. Mark a small angle at the base of each leg where the paw will meet the forest floor. Imagine the bone running through each leg as a single straight line, and hang the fur around it later.
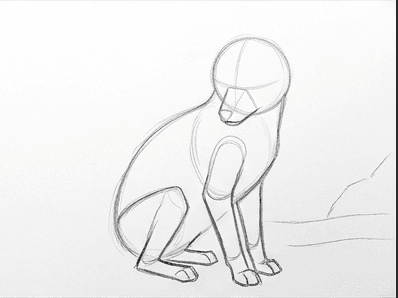
Add the folded back leg tucked under the body, drawing the thigh as a soft rounded mass and the lower leg angling forward to the paw. A sitting fox rests its weight here, so the back paw sits close to the front paws. Round off all four paws and erase any guide lines you no longer need. The far back leg barely shows, so suggest it with a soft edge rather than a hard line.
Place two tall triangular ears on top of the head, angled slightly outward. Then sweep the bushy tail from the hindquarters around toward the front paws as one fat curved shape. Replace your stiff outline with a softer, lightly broken fur contour along the back, chest, and tail. Foxes carry the tail low when sitting, so let it rest near the ground rather than floating behind them.
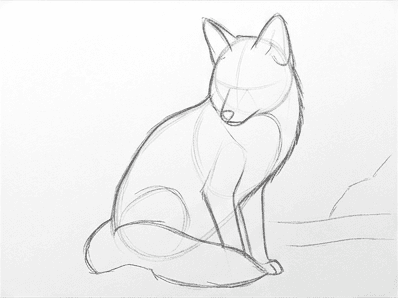
Set two almond eyes on the face center line, tilted a little, then add a small triangular nose at the tip of the muzzle. Keep the eyes fairly close together for that alert fox gaze. Draw a light ground line behind and beside the paws so the fox has somewhere to sit rather than floating on the page. Press lightly here, because the eyes and nose overwork easily and a heavy nose drags the whole face down.
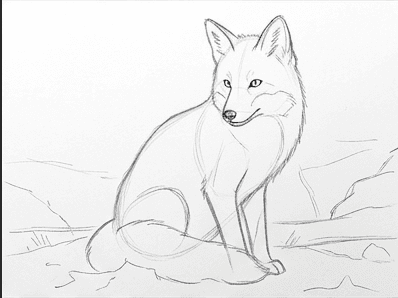
Lay a light, even tone across the background with the side of your HB pencil, keeping it soft and out of focus. Drop a darker cast shadow directly under the fox where it touches the ground. This early shading lifts the animal off its setting and gives the easy fox sketch a real sense of place.
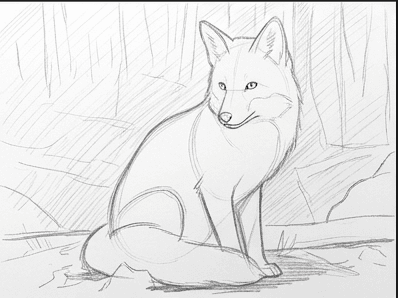
Switch to your 2B and hatch the shadow side of the fox: the chest, the underbelly, and the far side of the face and legs. Follow the direction the fur grows with short strokes rather than scribbling. This is the stage where the round body starts to feel solid instead of flat. Let the strokes overlap and build in two or three passes rather than pressing hard once.
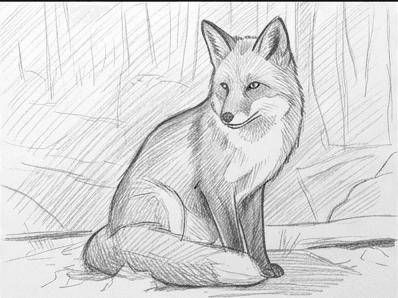
Finish with your 4B for the darkest darks. Those are the black stockings on the lower legs, the backs of the ears, the nose, and the deep fur beneath the tail. Pull a few light strokes outward at the chest and tail tip for stray hairs. These final contrasts turn a gray shape into a believable red fox. Step back from the page often, since the darkest darks read as stronger from a short distance away.
Common mistakes
A handful of errors show up again and again when people draw a fox. Most of them come from rushing the early shapes, so slow down while the drawing still looks like circles. Each one has a quick fix once you know what to watch for.
- Tail too thin. A skinny tail reads as a cat or a small dog. Rebuild it as one thick mass first, then add fur texture on top.
- Muzzle too long or too blunt. A fox snout is short and tapered, so if yours drifts toward a collie, shorten the wedge and sharpen the tip.
- Legs like tree trunks. Slim the legs right down and let the black stockings carry the visual weight instead of thickness.
- Eyes too round and too far apart. Foxes have close-set, slightly slanted eyes, so move them inward and flatten the top lid.
- Flat, even shading everywhere. Without a clear shadow side the fox looks like a sticker, so pick one light direction and darken the opposite side.
Practice prompts
Once this pose feels comfortable, change one variable and run the nine stages again. Draw the same fox from a head-on angle so you wrestle with foreshortened legs and a wider face. Then draw it at dusk, with a darker background and a brighter rim of light along the back, to push your value control. For a third pass, swap the red fox for an arctic fox and keep almost everything pale. That forces you to describe fur with shadow alone rather than dark markings. Keep each study to about fifteen minutes so you stay loose and learn the shapes faster.
Drawing a fox well comes down to honest shapes early and patient darks late. Run through these nine stages a few times and the proportions start to feel automatic, which frees you to enjoy the fur and the gaze. If you want this same staged workflow on your own reference photos, try the Learn to Draw app on iOS and Android. It turns any picture into a guided grid like this one, so you always have a clear next move in front of you.